
“You will enrich your life immeasurably if you approach it with a sense of wonder and discovery, and always challenge yourself to try new things.”
Nate Berkus
UPDATE: April 23, 2025
We sold this RV in October, 2022. After fulltiming in it since this shower pan was completed, we are happy to say that we never had another issue with it. That’s almost 7 years of daily use, and it was as solid as the day I installed it!
UPDATE: February 20, 2018
We are happy to report that, after pulling the lower access panel and inspecting the underside of the shower floor, everything appears to be the same as when we performed this repair in 2015. That’s 3 years of daily use. Needless to say, we are pleased at how well this has held up!
UPDATE: July 20, 2018
Today we discovered that the restaurant featured in this post, The Prized Pig, has gone out of business. As my father used to say, “That’s a revoltin’ development, Jimmer.” 😦
February 28, 2015
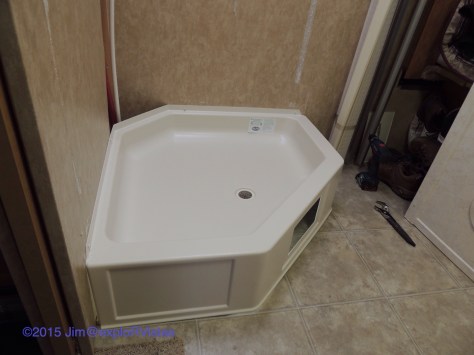
Last week, we noticed that our shower floor was cracked. Back when we first bought the trailer (used), we noticed the shower floor was ‘soft’. I had made an attempt to beef it up as best I could through the access panel in the front, but it was really a temporary fix at best.
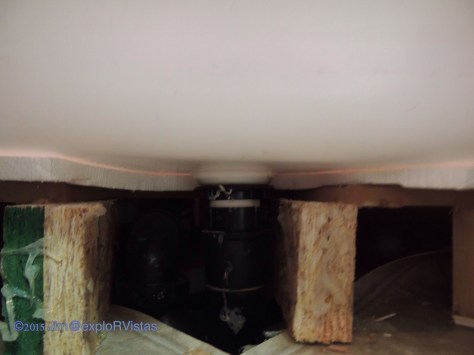
The photo above shows the OSB supports I slid in. There was still quite a large area unsupported.

As shown above, the floor cracked in two places. This left us with little option other than to replace the shower floor. After a short period of self pity, I sized up the situation. I briefly considered installing a residential shower, but felt that it would require too much customization, and I was concerned about the lack of access to the plumbing. When I pulled off the access panel from the shower base, I noticed the manufacturer label on the back that indicated the unit was made by Duo-Form. I did a little web search and found that they were located in Edwardsburg, Michigan, just north of South Bend, Indiana. I called them and found out that they still manufactured these showers. Road trip! This is where the cute doggie comes in….

We are watching my sister’s schnauzer Sophia for a few weeks. It has been really fun to have a puppy around for a little bit, and Sophia is just about as adorable as they come.
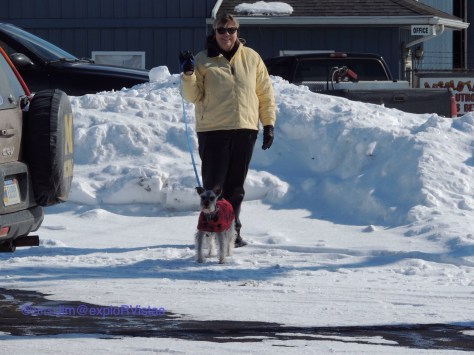
And she likes to ride in the truck! She wasn’t happy about the big snow piles in Edwardsburg, as it is hard to find a place to pee!

Duo-Form was easy to find, and the people there were very nice. We were in and out in a flash. Seeing it was around noon, we decided to find a place for lunch. My gluten allergy always makes it a challenge to find places to eat, and we usually check out the app ‘Find Me Gluten Free’. We prefer local over chains. Bingo! There was a bar-b-que joint listed about 8 miles from us.

On the outskirts of Niles, we found The Prized Pig.

This was a pleasant restaurant with a full parking lot…always a good sign!

All of their meats are gluten free, as are their cole slaw and beans (and possibly other sides…I didn’t check).

Diana and I both had chicken and beans, she had potato salad and I had slaw. She got both hers and my cornbread. 🙂 The meal was amazing, to say the least! After looking at the map, we determined that The Prized Pig is ‘on the way’ to my Aunt Marge’s place in Indiana, and we will be coming back to try the ribs! They are located at 33331 US 12 just southeast of Niles. Hours are 11 until they run out, Wednesday through Sunday.
Of special note to history buffs: Niles, Vandalia, Cassopolis and the surrounding area are all Underground Railroad historical sites. We definitely want to come back and check out the remaining ‘stations’ and learn about this part of American history.
Back home, time to dig into this project! Following is a sequential journey through this five hour long project.

The first step was to remove the glass door and frame, which came out as an assembly. It was held in by three screws on each side.

Next, I removed the three screws on each of the side glass panels, thus allowing their removal.
After that, I removed the three screws holding each of the C channels that the side panels were anchored to.
I had also debated whether or not to remove the aluminum channel from the base at this time, but decided to wait until I was ready to reassemble the new base, so as to not damage the corners on the channel. There isn’t a lot of room to set things in an RV in the winter.

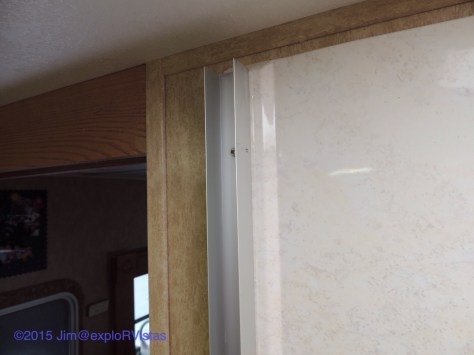
Hmmm…how is this shower head bracket attached? There are no visible screws. There is a tiny notch near the wall, though.
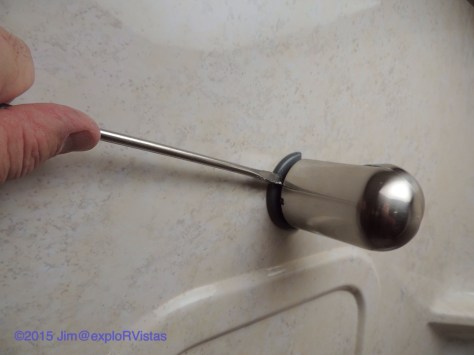
Putting a screwdriver in there revealed that the cover slides off.

And there are the screws! It was mounted with three…I got ahead of myself before shooting this image. 🙂

Once the shower head bracket was removed, I started working the plastic wall away from the back wall. The manufacturer had used a low-grade two-sided tape for this, and half of it wasn’t even stuck. That actually worked to my advantage.

Once I knew the wall had come off without damage, I shut off the water and disconnected the plumbing. I then set the surround out of the way.
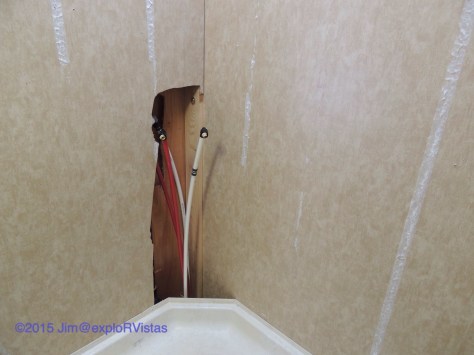
Wow…look at that access hole. It does serve it’s intended purpose, though.

I removed the drain connection and the four screws that attached the flange to the wall. The arrows point to the cracks.

It is easy to see the indentations in the foam from the platform. That entire front area was unsupported.

The platform itself was only made of 1/2″ thick MDF board.

Looking at the old platform, it is easy to see why it wouldn’t support much weight. Off to the trash it goes. 🙂

This is the area I had left to work with. The floor insulation can be seen below the subfloor. I trimmed off the loose linoleum to provide a flat surface.
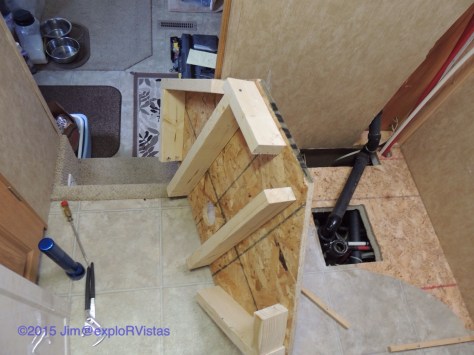
Here is my new and improved platform.. I used 3/4″ thick OSB and 2×4’s. It is solid as a rock. It did add a little weight to the rig, but that it perfectly OK.

Once in place, I secured it to the floor with screws toenailed in from the sides. Note that, instead of the U-shaped cutout that was in the old platform, I simply cut a hole for the drain. By doing so, I left the structural integrity of the platform intact. There was still plenty of access below the platform to reattach the drain line.

On the bottom of the new shower base, Duo-Form had the same area unsupported. Knowing that this would pose the same issue down the road, I filled it in with foam pieces from the old platform.
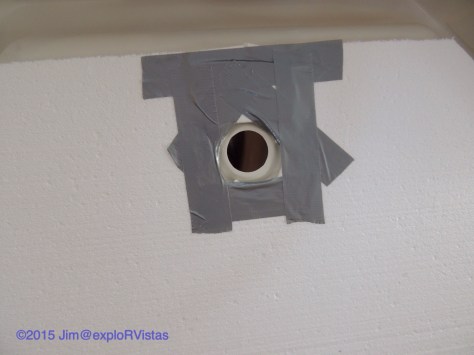
I then secured it with duct tape. It isn’t going anywhere, especially since it will be sandwiched between the base and the platform. Duo-Form, please take note of this, as this is a simple solution to a pretty big issue.
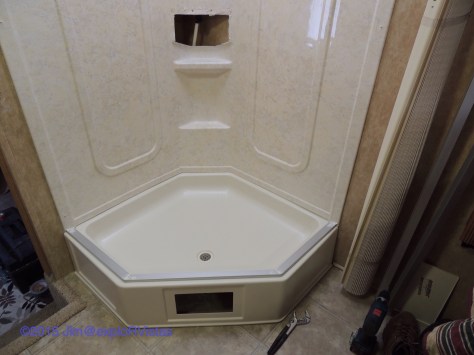
I reinstalled the new base by screwing the flange to the wall. I then reattached the drain.

Using 3M two-sided tape from Home Depot, I placed strips on the back of the surround walls next to where the old foam tape was. This allowed better adhesion. I had removed as much of the old tape as I could with a scraper.

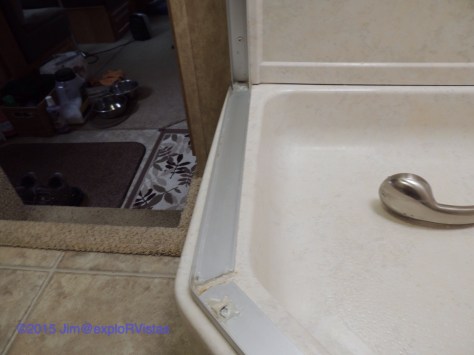
The walls went right back into place! Note that Duo-Form no longer makes the marbled color base. We felt the tone of the parchment colored base matched the old walls and were just fine.
I then attached the aluminum flange on the shower base, followed by the wall flanges and the shower head mount and plumbing.

Next, I reattached the side glass panels.

After that, I reinstalled the door assembly. Of all the work on this project, this piece of the puzzle was probably the trickiest. It required a bit of finagling and patience, but it finally went in. I then reinstalled the access panel and recaulked and was finished.
This project was a challenge to say the least, especially given the lack of space to do it in..and it being below freezing outside. Nate was right… it feels really good to have tackled this project and have it completed, and the repair should last as long as the rig.

Job well done! Great to have a nice road trip (with a tasty lunch), accomplish something of that scale AND save some mula!!
LikeLike
So true on the mula, Debbie! Can you imagine the hassle that would have been at an RV dealer? Man…..
LikeLike
Too bad about the shower, but the new one looks good! I can see that it is definitely a advantage being a handyman living the RV life. But on the other hand when is it not an advantage being (or having) a handyman close? 🙂 Sophia looks like a cutie by the way, there is so much good company in a dog! 🙂
LikeLike
Thanks, Inger! We were glad that we still had the YMCA memberships, so we could use their showers. The bath houses are closed for the winter at our campground. By the time I ordered the part and went to pick it up, a few days had gone by.
LikeLiked by 1 person
Looks like a good job! The new platform you made for it looks much stronger 🙂
LikeLike
Thanks, Rob! Yes, it definitely is stronger. I’m not sure why the RV manufacturer went the route they did, as it was bound to fail. It is good to go now!
LikeLiked by 1 person
Very nice, Looks like it will perform better than original.
LikeLike
It sure is, Mike! The MDF platform that was there before was way too weak.
LikeLike
Well done install. Glad you did not have any water damage.
LikeLike
Thanks, Mark! There was just a small amount of water on the floor…hardly anything.
LikeLike
That is an intimidating project but it looks like you not only fixed it, you replaced it so it should not happen again. Great job!
LikeLike
Thanks, Jim! I pretty much knew what I needed to do, but there is always that ‘what if’ factor, when you start to dig into a project. My biggest fear was being able to save that surround without cracking it.
I keep thinking about that bar-b-que chicken….. 🙂
LikeLike
Good work
LikeLike
Thanks, Mike and MaryLou!
LikeLike
That’s quite the job and nicely done. It’s amazing that manufacturers don’t make the platforms stronger.
LikeLike
Thanks! Yes, we will definitely be checking for structural issues when purchasing our next rig.
LikeLike
Old post but still relevant. Nice job and thanks for documenting your repairs. I can see this in my future as I’m already seeing some symptoms.
LikeLiked by 1 person
Thanks, Kim! It still is holding up well, and we use it every day.
LikeLike