

July 5, 2021 – Leelanau County – Written by Jim
One thing we’ve found on the cabin build this year is the fact that things don’t always move in a straight line. Just about the time that we will think we have our day planned, one of the subcontractors will have a need that requires our immediate attention. It’s all good, as problems and solutions are forward progress! With that being said, excuse us if this post zigs and zags a bit, as it is representative as to how the past few weeks have played out.
Since we last posted, our build has been dominated by the HVAC (heating/vent/air conditioning) team and the plumber. Wanting to stay out of their way, I went to work installing the deck posts and bracing on the large deck. As I was framing, “hey Jim…can you come here for a minute?” would ring out from inside. So far, every issue has had an adaptation`. 🙂
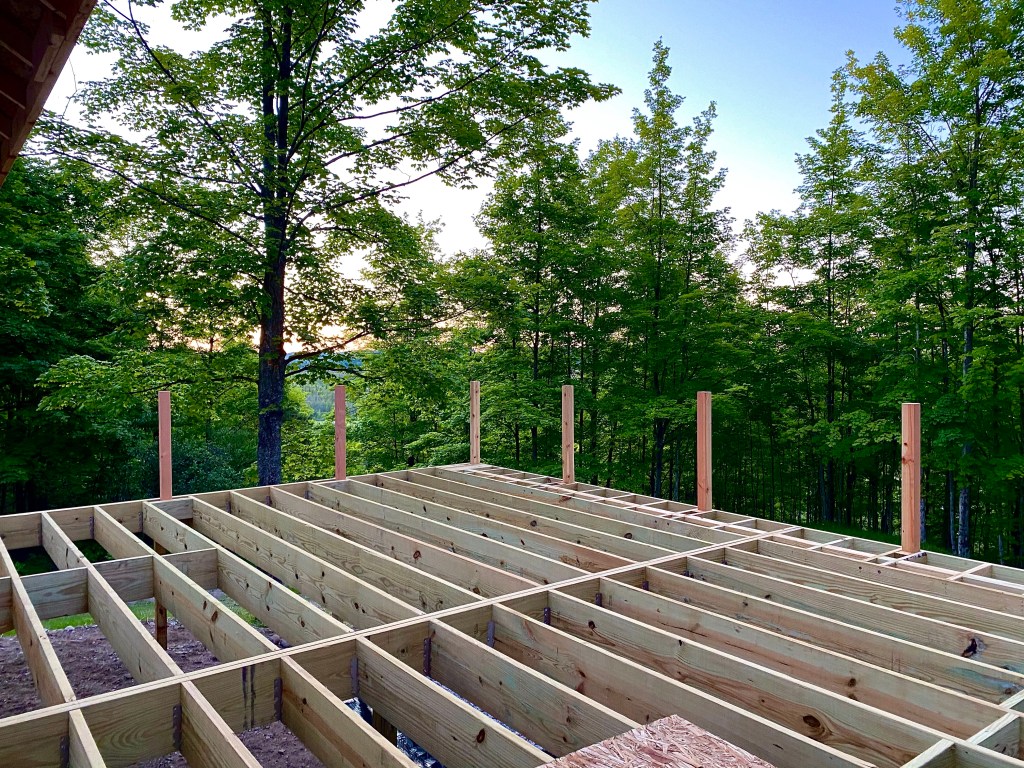
The twelve posts around the deck perimeter are installed, as is most of the blocking in between the floor joists. The unusual blocking at the outside of the deck is needed for the triple picture framing method we are planning for this particular deck. More on that in a future blog post when we install the deck boards. In order to secure the deck posts, we had two products available for us to use. Both were made by a company by the name of Simpson Strong-tie. As the inspector was looking over our place during the deck footing inspection, he had noticed some splitting in a few roof trusses, caused by the screws we used to tie them to the walls. He said “Simpson makes a screw that doesn’t do that”, so we decided right then and there that we would use Simpson products from then on.

The brown screws with the big heads on them are what we chose as our fastening method. The chart we used to determine the length called for 5” and 8” screws, but since our deck has double beams extending out from the cabin, we needed to use 10” screws to go through those.
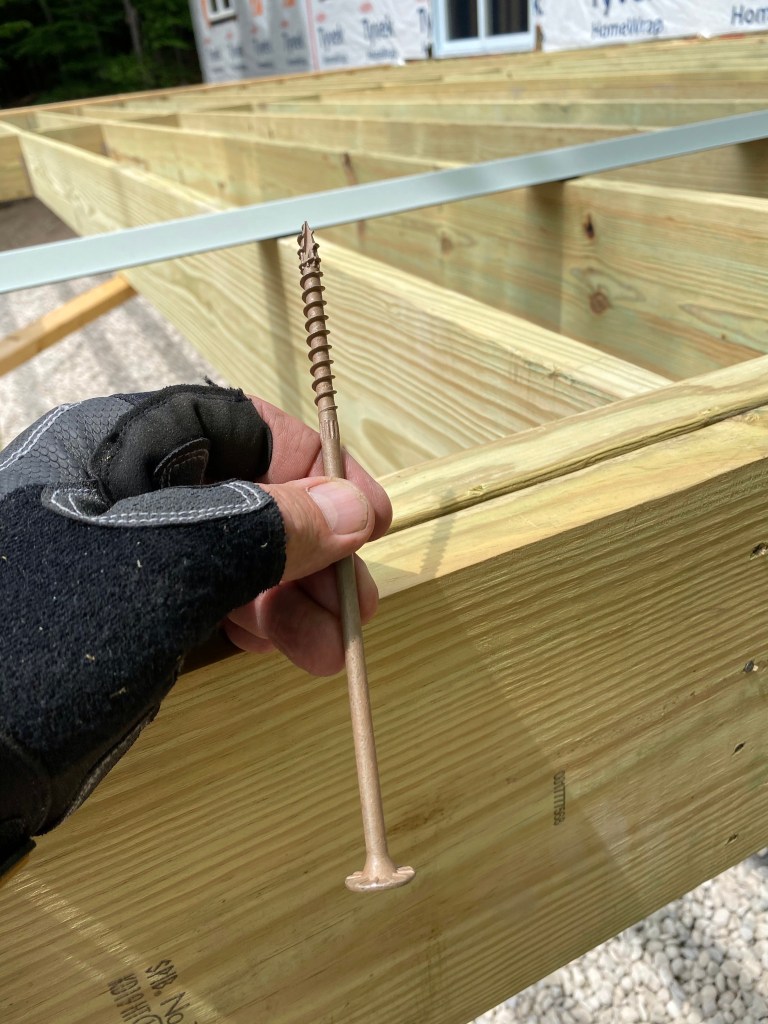
That is one formidable fastener! No pre-drilling required and, true to what the inspector said, they did not split the wood. At a dollar each, we would hope that they wouldn’t!
Meanwhile, the plumber and HVAC guys were busy drilling holes in the walls and floor.

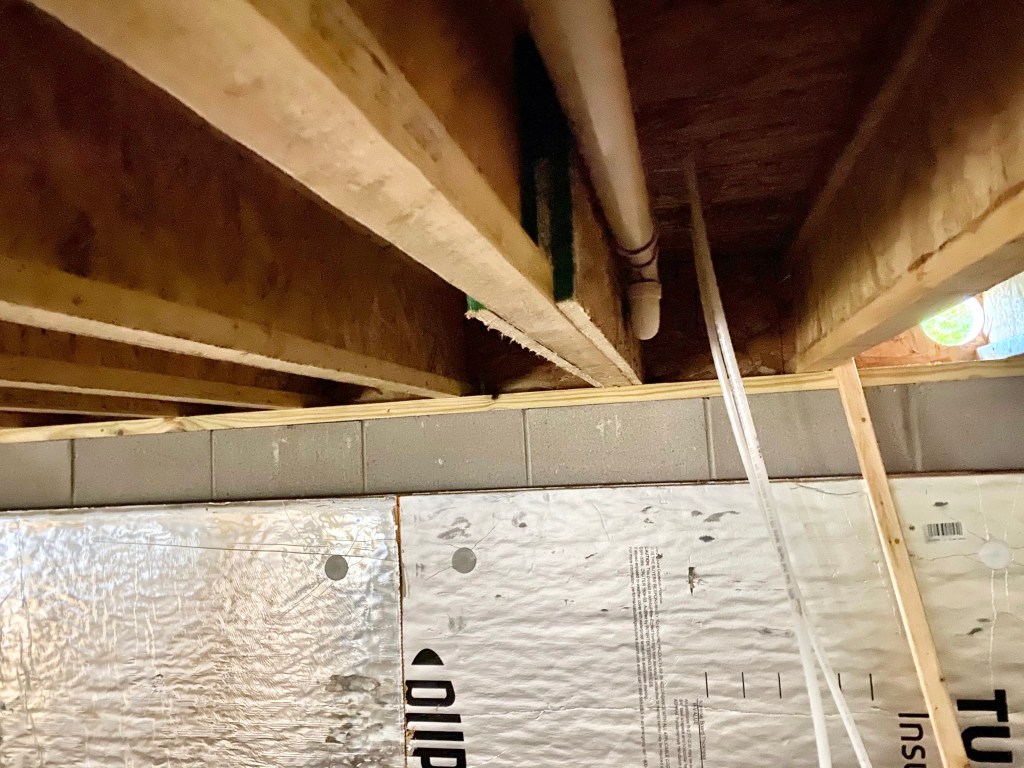
This photo is taken with my back to our wall of windows on the one end. All of our rooms have vaulted ceilings and each of our closets are capped at 8 feet high. That allowed us to open up the area above the closets to give the hallway a more open feel. The closet on the right (you are seeing the back of it) is where the first issue arose. The washer, dryer and utility sink live in there. As you can imagine, the water, sewer, electric and dryer vent all have to go through the back wall. The problem arose when it was discovered that a I-truss floor joist was directly below that wall. That meant all of those utilities would have to jog around the I-joist. The closet isn’t deep enough to scoot the washer and dryer further from wall, so our only solution was to build a platform for them. That allowed the piping to jog around the truss under the platform and go back into the wall.
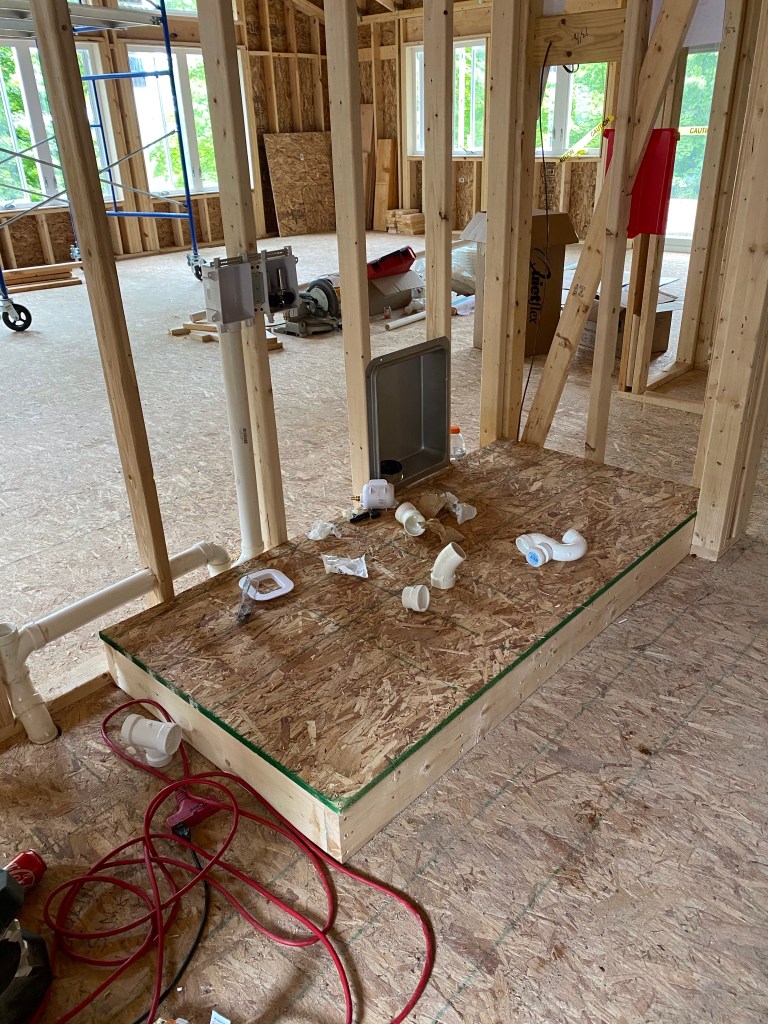
Now we won’t have to bend over as far to get into the front-load machines!
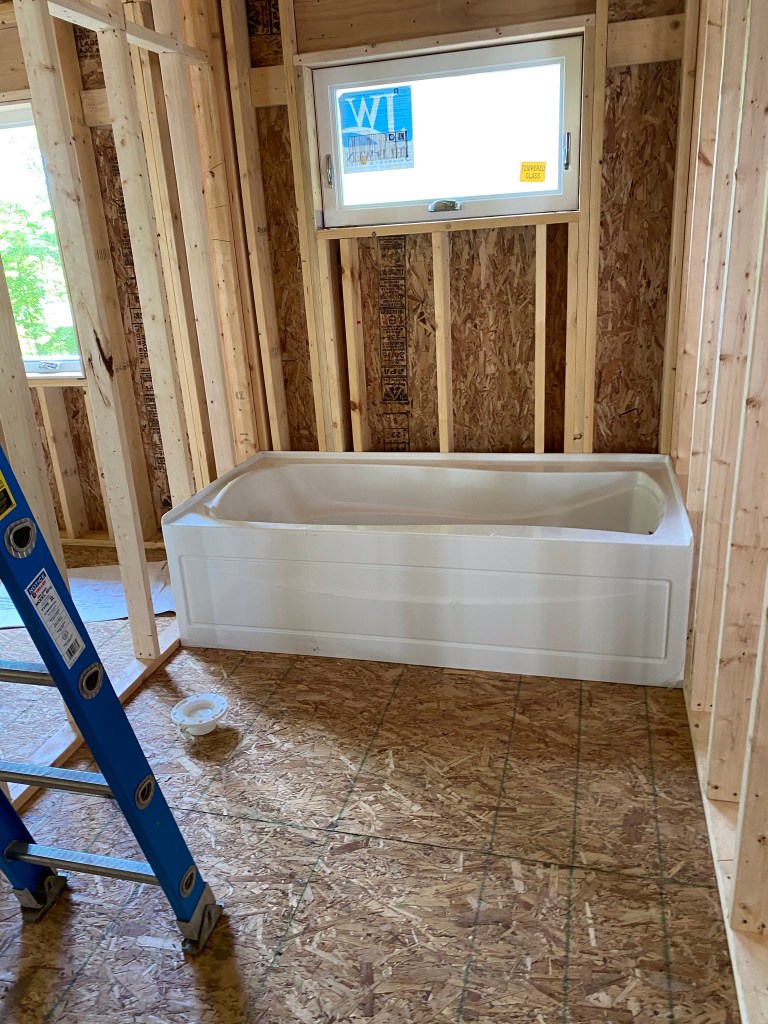
Next up was the bathtub. While the framers made sure the drain didn’t land on an I-joist, they forgot to take into account that the tub had an overflow drain that hung below floor level. You guessed it….it ran right through the top of an I-joist. Our only choices were to either raise the tub and put molding on the front edge where it meets the floor, or notch the joist. Not wanting a molding on the front of our tub, we chose the latter. That involved an engineered repair from the I-joist company.
After several emails back and forth with Menards corporate, we had an engineer stamped document in our possession that detailed the fix. I immediately went to work on that. A little side note: when hammering boards into place between floor joists, be sure to wear hearing protection. The first whack of the hammer cranked up my tinnitus threefold, and it took a few days for it to return to baseline!
By the time I finished that, we met with the electrician to discuss switch and lighting placement. That was an exciting process to discuss where our lighting would go! One situation cropped up in the main bath had me tearing apart a doorway and moving it over 4 inches to make room for switches. By this time, I decided the deck would have to wait and that I needed to concentrate on the interior walls. That’s when Kris from HVAC requested blocking on the exterior of the house to allow the piping to exit.
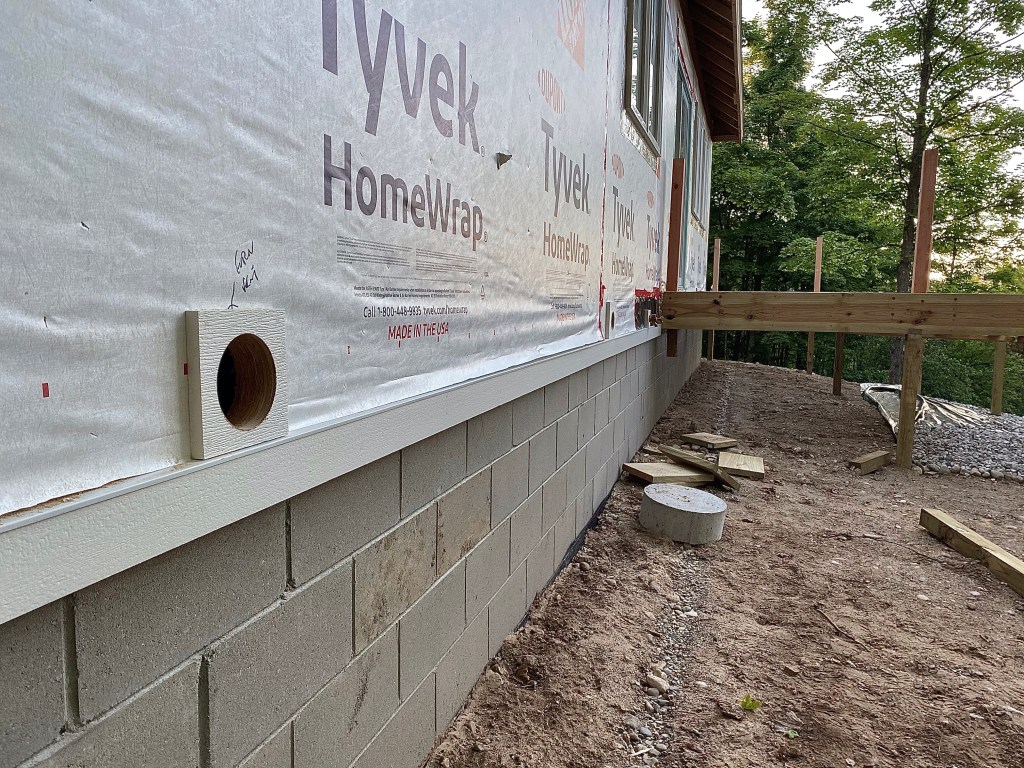
In order to do that, we needed to first install our skirt board, the white decorative band that separates our siding from our foundation. That required a phone call with our inspector, as we are not supposed to side the building before the rough framing is approved. That comes after the rough plumbing, HVAC and electrical. Thankfully, we have a great relationship with our building inspector, as he knows we like to do things right. Once I had permission, I zig-zagged to that installation. The plumber jumped in and requested blocking for the outside faucets, so I took care of those at the same time.
About the time I finished that, Kris informed me that he could set the outside air conditioning condenser if I finished the siding on that end of the house. Another call to the inspector confirmed that we indeed could side the ends before the rough framing inspection, just not the front and back. I quickly called the siding supplier to get the shakes for the gables (same as what’s on the barn), only to find out that they were out of stock. Surprisingly, this was one of the few Covid-related stock issues we’ve had, as the supply chains are still out of whack on siding. Not to worry, as their Grand Rapids location had plenty for us to pick up. So we made the six-hour round trip to GR on my birthday to get material! It was a gorgeous day for a drive. 🙂
Before I could take the scaffold down from the inside of the cabin, I needed to finish installing the jambs on the trapezoid windows.
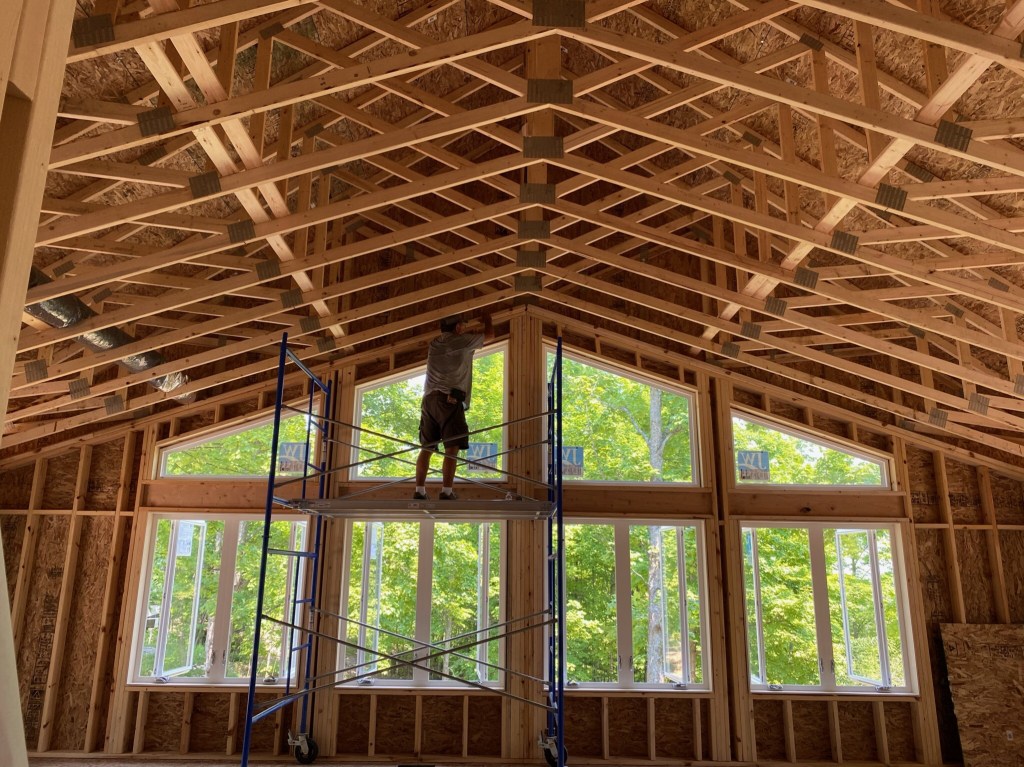
I can almost see Traverse City from up there! I finished that and all of the interior blocking for towel rods, cabinets and grab bars…as we aren’t getting any younger. I am going to frame the fireplace today and move on to exterior siding from there.
Jumping back to the space above the closets, our master and guest closets are back to back and sit directly below the peak of the cabin. Not wanting to lose that space, we came up with a plan:
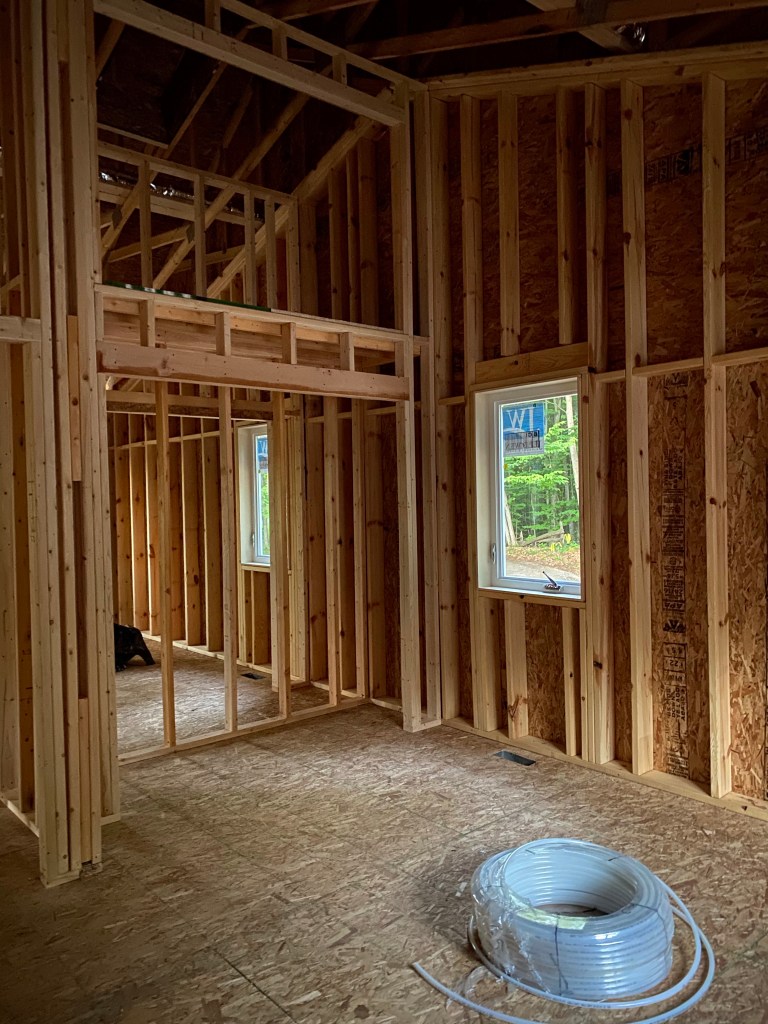
We built a solid floor directly above both closets which is open to the master bedroom side. Our closets have two-panel mission style doors, with one panel being larger than the other. We made the opening the size of the larger panel, and we will cut a set of bifold doors to fill that space. They will line up directly above the ones below. We’ll access that area with a step ladder and put long term items in tubs up there. Our attic access hole is also up there.
On the social side of things, we celebrated the return of Music in the Park in Northport! This weekly event was cancelled last year, due to the pandemic.
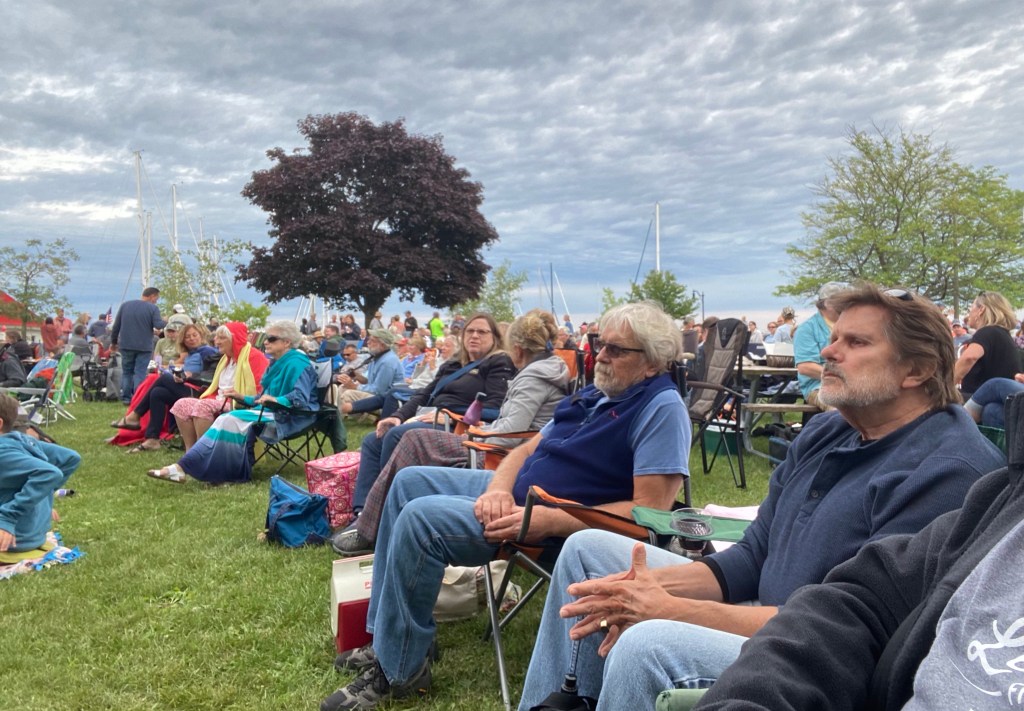
Patti, Lane, Rob, Diana and I chilled to the reggae group Soul Patch on the shore of Grand Traverse Bay. It was wonderful to be able to enjoy live music again! We also enjoyed a great afternoon on Independence Day with Diana’s cousin Jerry.
Stay tuned for our next post, when we should hopefully have our rough permits approved. Once that happens, we can get the insulation and drywall started. Our plan is to finish the siding and decks while all that is happening. Until next time, safe and happy travels to all!

Ah, the joys of home construction. Adapt and persevere is the name of the game. Great job coming up with solutions for all the challenges. Glad that you were able to find some siding in GR, that could have turned into quite the delay!
LikeLiked by 1 person
Indeed it could have, Jim! I certainly don’t want to be spending Florida beach time up here putting on siding!
LikeLike
You are good! And so is your inspector. Coming right along and won’t be long you’ll be moving in.
LikeLiked by 1 person
Thanks Gaelyn! One thing I failed to mention was that I went through and used Simpson hurricane ties on all of our trusses. Better safe than sorry!
LikeLiked by 1 person
You guys are making awesome progress!! So much work so happy for you! We are heading to Wild Cherry and thinking of you both. Have a great week!
LikeLiked by 1 person
You also, Wanda! 15 new sites at Wild Cherry this year!
LikeLike
A positive attitude makes for bearable re-dos and workable adaptations! I hope you’re getting lots of sleep 🙂 Love the added storage above the closet – so smart to do it now before the dry wall goes up. I’m still in awe of those amazing windows!! Fun to be back in the park for music. Looking forward to doing that again with you guys next summer.
LikeLiked by 1 person
There was a time before I put that skirt board on where I wasn’t sleeping a full night, as I had a lot of nervous energy going on, Jodee. Now that the outside is on its way to being buttoned up, I am sleeping much better. Looking forward to Music in the Park with the Gravels next year!
LikeLike
The cabin us looking amazing! Good to keep the positive attitude when building or renovating. There are always little challenges. Glad you were able to come up with fixes for all. Definitely want to have that great relationship with your inspector! Love, love those windows. It is nice to see that you do take breaks and relax some:)
LikeLiked by 1 person
It’s amazing how much more involved the cabin is over the barn, Pam. The important thing is for us to have fun with it, which we are doing. 🙂
LikeLiked by 1 person
Jim and Diana,
My husband, Curt, and I have been following your blog as well as many others from your “full-time freedom” year for quite sometime! This spring, we purchased a fifth-wheel and signed up to be volunteer campground hosts at Leelanau Stare Park for July. We have lived the past nine days! Currently, we are at the Northport Music Night! How awesome is this! If you have time, we would love to meet you for coffee, over a beer, during music, or even to help with your build. Please, feel free to reach out to my hubby, Curt, if you have the time! ((616)638-0492 (text preferred) thanks!
LikeLiked by 1 person
Hi Shelly! It’s always fun to hear from readers who we’ve helped along with the blog! So cool that you are volunteering at Leelanau SP. We are usually at Northport on Fridays, so look behind the soundboard for a guy in a white baseball cap (me) and say hi!
LikeLike